Easy Multicoloured Prints: Mid-print Pausing in Cura
Introduction
Recently I designed some coasters based on the Warning Signs from Portal. When I came to print them, I really wanted to use both black and white filaments to match the original design. Whilst I could just watch it print and pause it manually, I knew that G-code must have a pause fuction built in.
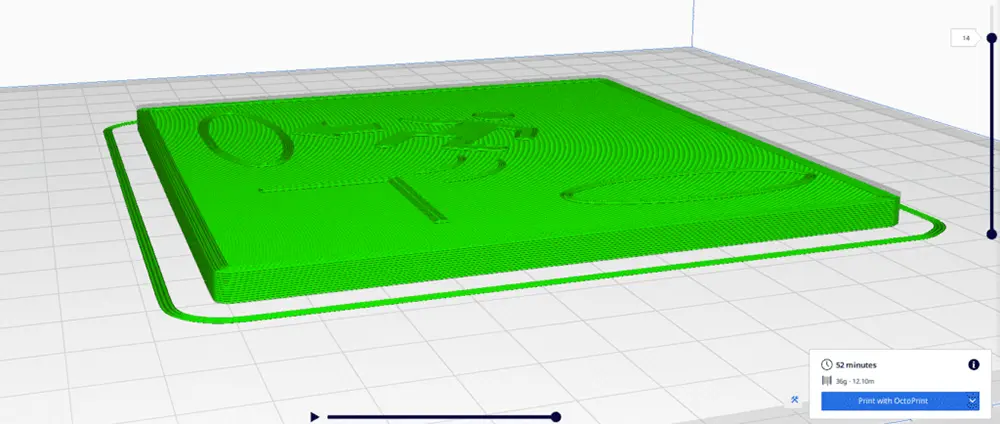
Telling Cura to pause at certain layers is actually a simple process, and is built right in! The first thing you’ll want to do is figure out what layer you’re wanting Cura to pause at. To find this:
- Slice your design, then navigate to the preview tab.
- Use the right-hand slider on the Preview screen to determine which layer you want to pause at.

Next, you can add the pause function into Cura, to find the option follow the below steps:
- In the Menu bar, open the Extensions Tab.
- Select Post Processing, and then ‘Modify G-Code’.
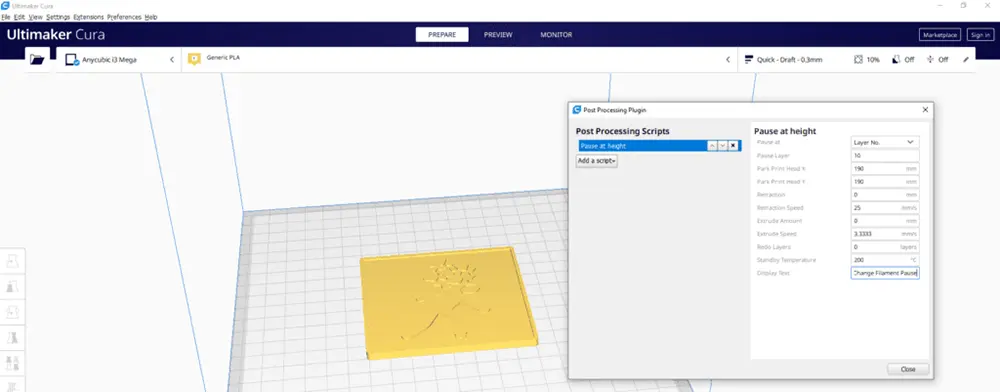
- In the newly opened window, press the ‘Add a Script‘ button.
- From the dropdown, select ‘Pause at height‘.
This menu shows a variety of options you can adjust and tweak. The option to set is the ‘Pause at‘ option from ‘Height‘ to ‘Layer No.‘, then set the pause value appropriately.
Below are the settings that I have used successfully, and when I’m doing prints involving filament changes. I watch the print at regular intervals and so don’t mind leaving the ‘Standby Temperature’ option at printing heat.

This was just a short post. It took me a fair bit of Googling to find how to do this, so thought I’d document the process as you guys might find it useful too! If you have questions about the above process, drop a comment below and I’ll happily answer them!