Couch Co-op Made Easy: Raspberry Pi Steamlink
Introduction
I really like my Steam Link, and use it a lot for couch co-op games. But was rather disappointed when Steam announced they were discontinuing it around the time I was looking to buy a second unit. However, my disappointment didn’t last long when Steam released the Steam Link app for Raspberry Pi!
I love the fact that the Steam Link software runs on a Raspberry especially as the overall the setup doesn’t take long at all! If you’re wanting to create your own Steam Link Pi, there are a few requirements which you can find at the bottom of this post!
Setting up the Raspberry Pi
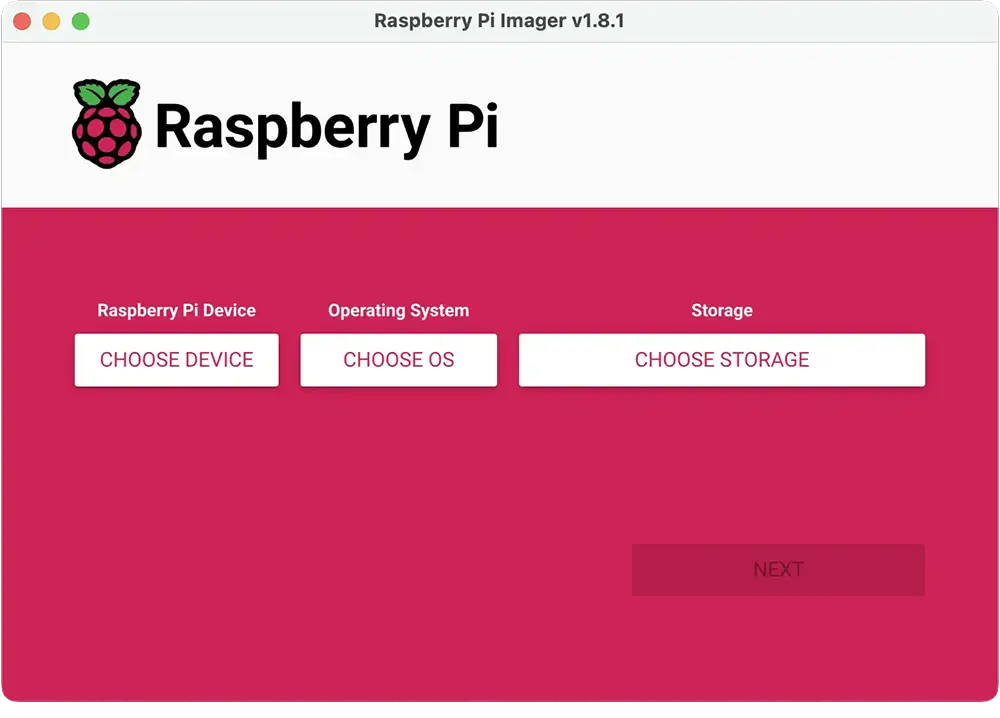
The first thing you’ll need to do is flash your micro SD card with the latest version of Raspberry Pi OS (previously known as Raspbian). The easiest way to do this is to download the official Imager available from the Raspberry Pi website here.
Downloading and running the software, you will need to select your model and micro SD card. For the OS, select the first option ‘RASPBERRY PI OS’. If you are using an older generation Pi like me, this will have (Legacy) at the end.
Once you’ve flashed your SD card, you’ll want to connect the Pi up with a screen, internet, and mouse/keyboard. This can be setup at your desk, as we will set the Steam link software to auto-launch later!
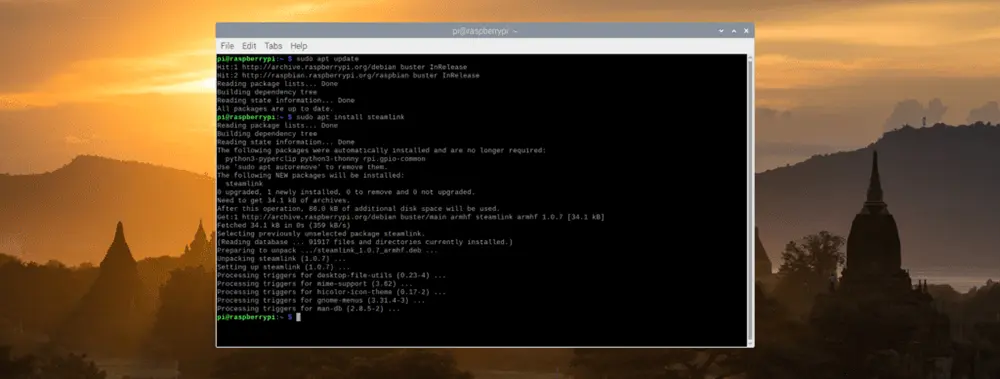
When your Pi has booted up, open the Terminal via the top menu (or use the shortcut Ctrl+Alt+T) and enter the following commands:
sudo apt update
sudo apt install steamlink
This will first update the Raspberry Pi’s package list, and then will install the Steam Link application. During the installation, it may prompt you to confirm, press Y and the installation will continue and finish.
Once the application has installed, you can close the Terminal and launch the Steam Link Software, via the Top Menu > Games > Steam Link.
Configuring Steam Link
Launching the app, you will be greeted by the Steam Link Application which guides you through the setup process to connect the Steam Link Pi to your main PC with Steam running.
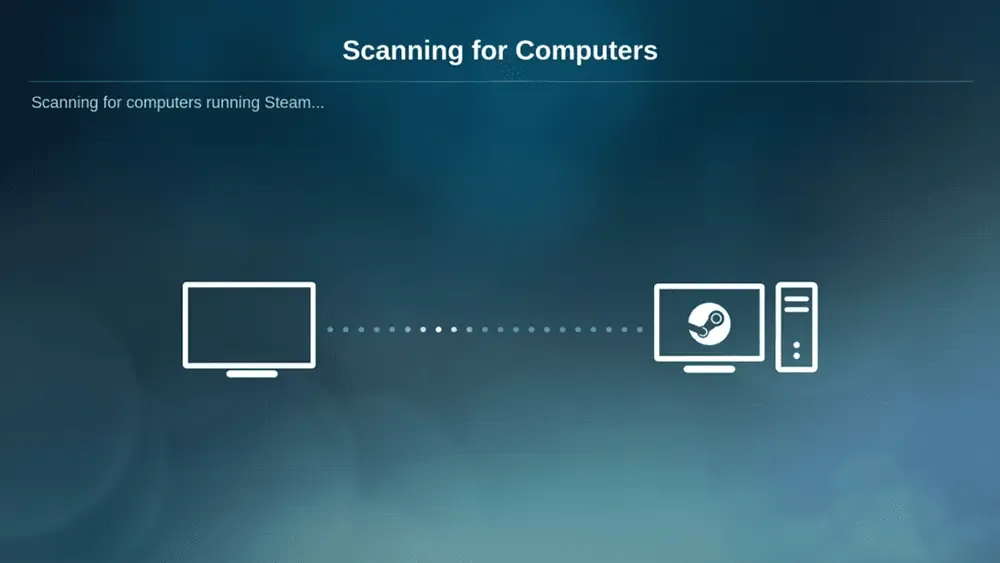
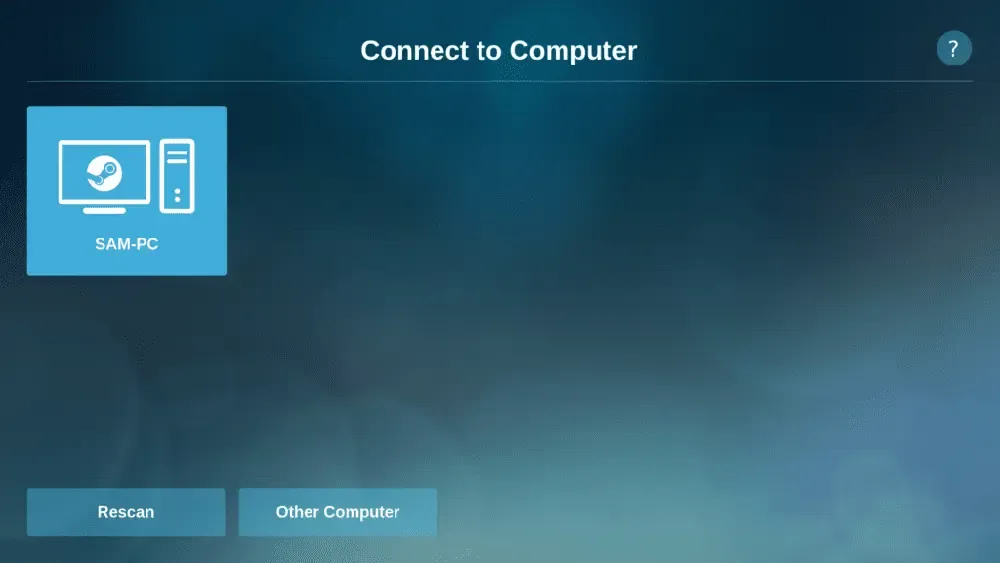
If the Steam Link Pi doesn’t find your computer, you need to enable Remote Play on your Main Computer. To do this, on your computer open the Steam settings menu, open the Remote Play section and make sure that Enable Remote Play is ticked.
Running at Boot
If like me, you’re planning to just use your Raspberry Pi for the Steam Link application, you’ll be happy to know you can set it boot straight into the app.
Doing this is extremely simple but requires a few steps. First, open up Terminal (Ctrl+Alt+T) and enter the following command:
sudo nano /etc/systemd/system/steamlink.serviceThis will open a blank text file, in this, you’ll want to add in the below to it:
[Unit]
Description=Start Steam Link on startup
[Service]
Type=simple
User=pi
ExecStart=/usr/bin/steamlink
#Restart=always
Restart=on-failure
[Install]
WantedBy=graphical.target
#WantedBy=multi-user.target
To save this press Ctrl +X, confirming with Y. Then update systemctl with the following command in Terminal:
sudo systemctl daemon-reload
sudo systemctl enable steamlink.service
3D Printed Case
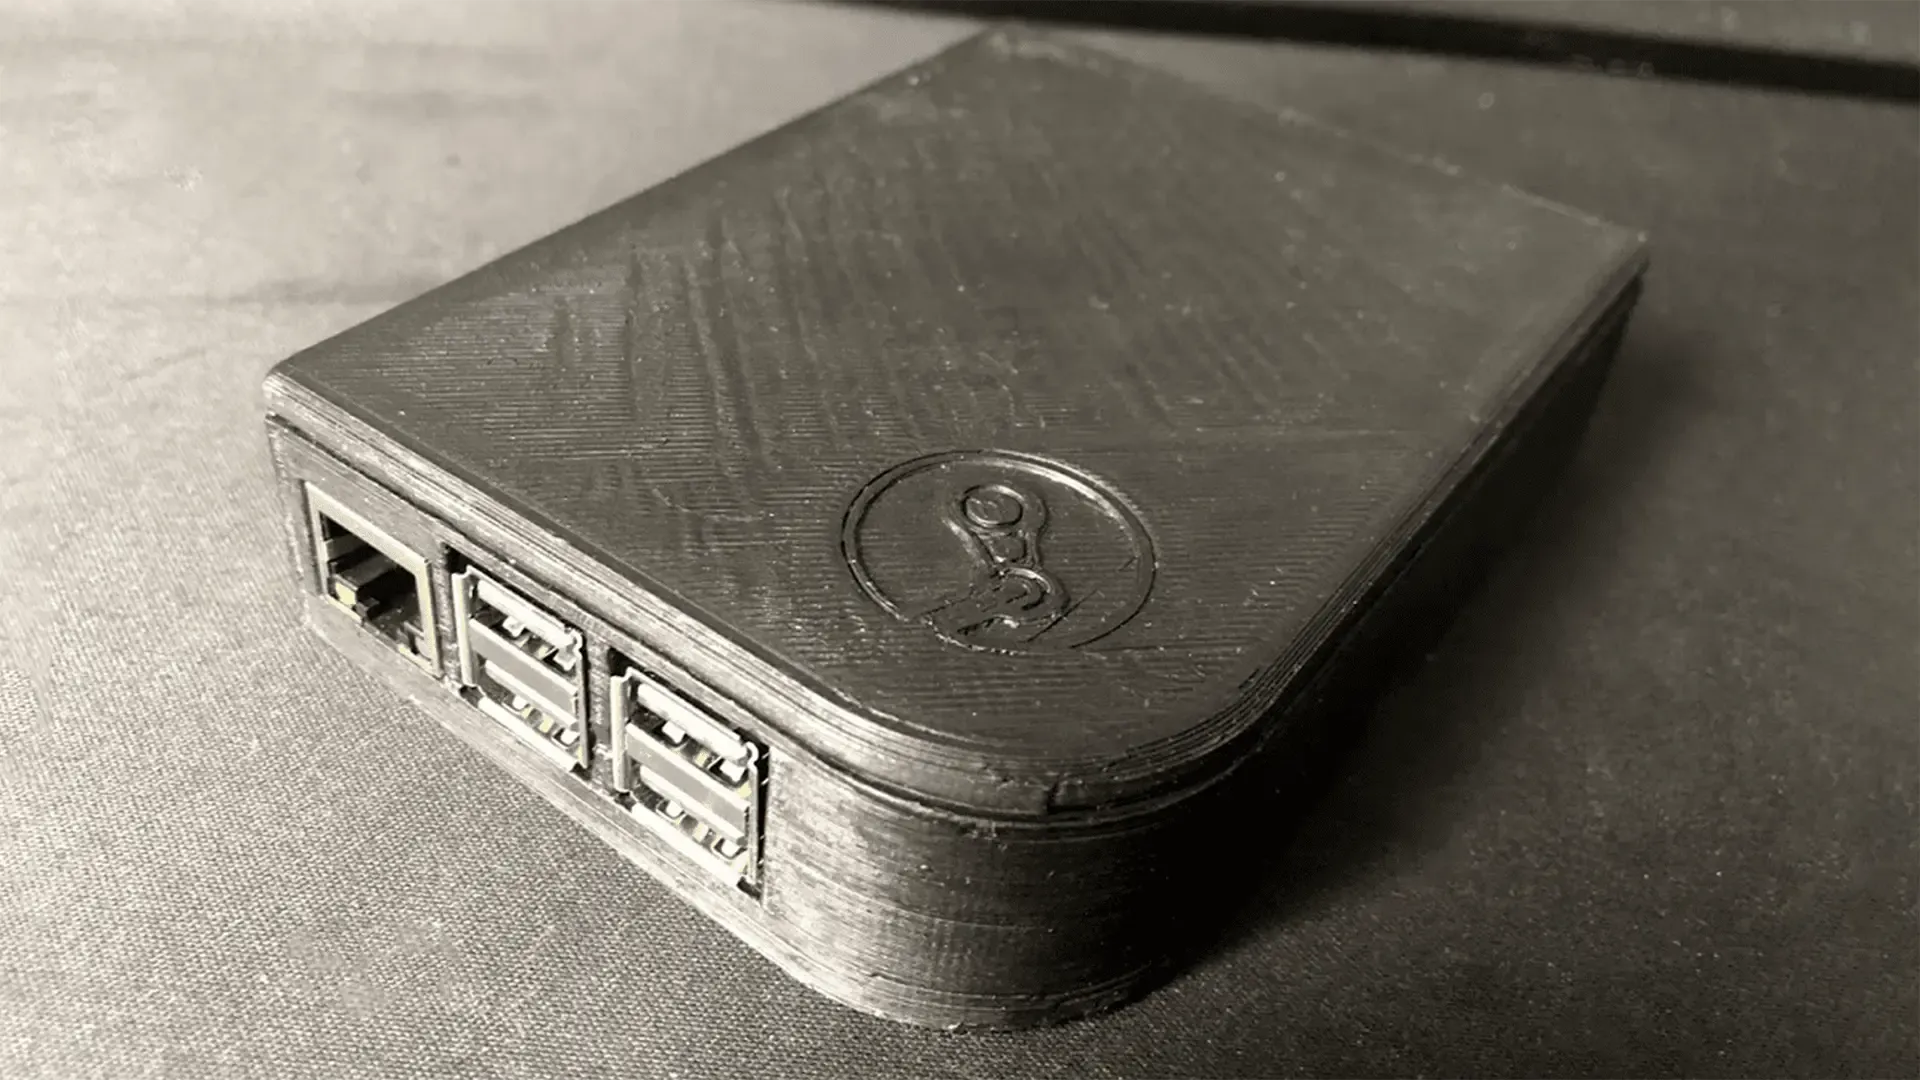
One of the biggest delays in doing this project was this section. I recently got a 3D Printer and really wanted a case for my Pi resembling an original Steam Link. In my search, I couldn’t find anything suitable for a Pi 3b+ so took the challenge on myself! I recently started learning Fusion360 and this would be a splendid chance to learn more!

This has been a project I’ve wanted to do for quite a while and am extremely happy I finally got my teeth into it! If you have questions about this project, drop a comment below and I’d be more than happy to answer them!
Featured Equipment
As an Amazon Associate, TechTrail earns from qualifying purchases made with some store links.